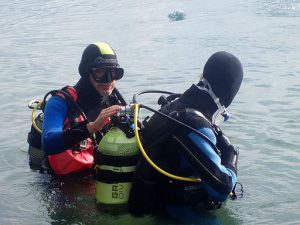
 Your dive gear and your buddy’s is the most important combination of equipment because it’s your life support underwater!!
When you’re diving, the last thing you want is to have problems with your dive gear. The best way to minimize equipment failure underwater is to learn how to do a scuba dive buddy check.
I will show you how easy this is to do in only 5 steps which you and your buddy do on each other’s dive equipment prior to entrance into the water. In addition, I have a video with audio that demonstrates how to do this.
Dive Equipment Incident Statistics
According to Dan’s Annual Diving Report 2016 Edition, there was a total of 18 incident cases for 2014 in regards to dive equipment malfunctions.
- 2 cases of BCD detachments from its corrugated hose
- 2 deceived pressure readings due to sensors stuck on the Submersible Pressure Gauge
- 2 cases of regulator free flowing
- 2 inflator cases of free flow from BCDs
- 1 reported air dump failure
- 1 regulator that was modified in rebreather
- 1 case of failure on an inflator and regulator combined
- 1 BCD leakage
- 1 dry glove leakage
- 1 reported case of integrated weight pouch lost
- 1 malfunction of a regulator’s first stage
- 1 explosion of a high pressure hose
- 1 reported octopus that couldn’t be used due to a twisted bungie necklace
- 1 BCD set on fire ( never heard of this happening before and not sure how it was set on fire)
Incidents were also reported on divers who started their dives with the tank not fully open and realized it was harder to breathe at depth.
A buddy check also referred to as a Pre-Dive Safety Inspection is a necessary procedure no matter what type of diver experience you have. It’s performed by 2 divers (i.e. the diver and buddy).
There are important reasons why we learn the buddy check technique in our Open Water Dive Certification Course (entry-level) and for sure you would want to make this a great habit to do before entering the water. It’s your FINAL check!!
Reasons to perform the buddy check!

Doing this pre-dive check means less stress giving you peace of mind and more fun diving.
Doing our pre-dive check helps you and your buddy recognize problems by correcting them before making the entrance into the water and to minimize equipment malfunctions and failures.
It’s also a great opportunity and extremely important for you and your dive buddy to become familiar with each other’s dive gear, for example, you need to know where your buddy’s dump valves are located in case of an emergency situation.
Pre-Dive Buddy Check Steps (BWRAF)
Here is a great video to watch! The music is loud and so you will probably want to turn the volume down. You won’t hear anyone talking because the Instructor is demonstrating the Buddy Check and the idea is to observe what he is teaching.
There are 5 easy steps and the best way to remember this in order is by way of PADI’s acronym BWRAF ‘Begin With Review And Friend’ or ‘Burger With Relish And Fries’ or use what works for you…
B – BCD
- Look for rips and tears.
- Inflate to make sure air is accepted.
- Deflate to release air.
- Ensure there are no sticky buttons.
- Test the oral inflator.
- Use the dump valves and make sure air releases quickly.
- Make sure the straps are down flat with no slack.
- Check the tank band and make sure the tank is secured (consider wetting the BCD first before mounting on the tank to prevent slippage in the water).
- Check the low pressure inflator hose and connection.
W – Weights
- Proper weighting.
- If Integrated – ensure weight pockets are securely snapped in. Look for anything in the way that could potentially snag and release them accidentally. Know where to reach the pockets and how to release them.
- If Belt – ensure the belt length is adequate and setup for a right hand release. The weights should be evenly distributed and the belt secured. Loose ends should be tucked in a manner that the belt can be released and ditched in the event of an emergency.
R- Releases
- You should know exactly where the releases are located.
- Be familiar with how to unfasten the releases.
- Check to make sure they are secured properly.
A-Air
- Tank air valve is turned on fully and lots of air, understand reading measurements in bars and psi.
- Test your regulators by breathing thru them 3 times. It should be easy to breathe. There should be no odors and it should feel dry and fresh. At the same time, check the pressure gauge to make sure the pressure hasn’t dropped. Test the purge button to make sure it doesn’t free-flow.
- Check all the hoses looking for tears, appearance of being worn out and ensure they are properly connected.
F-Final Check
- Do a complete walk around and do a head to toe final look for streamlined effect where no loose ends are dangling, no twisted hoses, nothing is forgotten… defogged mask, fins, rest of dive accessories like compass, dive whistle, dive sausage, etc. (Review your emergency checklist).
Now you should be good to go! Remember don’t compromise safety… if something is not working and you thing it’s a minor issue and you don’t have the parts to repair it, ABORT your dive!!
Thanks for reading! If you or your dive buddy have any stories on buddy checks or you’re new to diving and have any questions and comments, I really would like to hear from you. You can put them in the Comment Box below!
